In the previous article, we have discussed what is Optical Interference, in this article we are going to discuss Interferometry in metrology. In simple words, Interferometry is nothing but the use of optical interference to carrying out precise measurements of very small linear dimensions.

Interferometry in Metrology
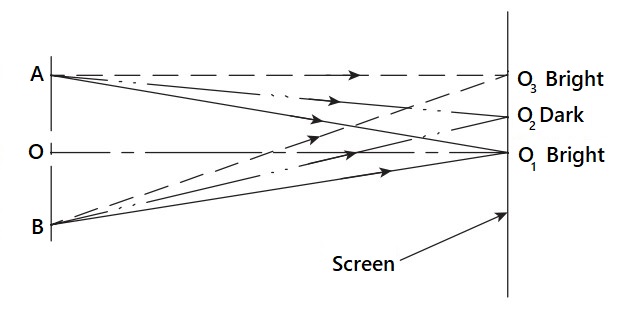
Due to the Optical interference of two or more lights, there will be a number of fringes (pattern of bright and dark areas) that appear in a given length on the screen is a measure of the distance between the two-point light sources and forms the basis for linear measurement. This phenomenon is applied for carrying out precise measurements of very small linear dimensions and the measurement technique is popularly known as interferometry.

This technique is used in a variety of metrological applications such as inspection of machine parts for straightness, parallelism, and flatness, and measurement of very small diameters, among others. Calibration and reference-grade slip gauges are verified by the interferometry technique. The instrument used for making measurements using the interferometry technique is called an interferometer.
- A variety of light sources are recommended for different measurement applications, depending on the convenience of use and cost.
- The most preferred light source is a tungsten lamp with a filter that transmits monochromatic light.
- Other commonly used light sources are mercury, mercury 198, cadmium, krypton 86, thallium, sodium, helium, neon, and gas lasers.
- Among all the isotopes of mercury, mercury 198 is one of the best light sources, producing rays of a sharply defined wavelength.
- In fact, the wavelength of mercury 198 is the international secondary standard of length.
- Krypton-86 light is the basis for the new basic international standard of length.
- The meter is defined as being exactly 1,650,763.73 wavelengths of this light source, measured in a vacuum.
- Gas lasers comprising a mixture of neon and helium produce light that is far more monochromatic than all the aforementioned sources.
- Interference fringes can be obtained with enormous path differences, up to 100 million wavelengths.
The optical flat is the popular choice for measurement using the interferometry technique, a host of other instruments, popularly known as interferometers, are also available. An interferometer, in other words, is the extension of the optical flat method. While interferometers have long been the mainstay of dimensional measurement in physical sciences, they are also becoming quite popular in metrology applications. While they work according to the basic principle of an optical flat. they provide additional conveniences to the user. The mechanical design minimizes time-consuming manipulation. The instrument can be fitted with additional optical devices for magnification, stability, and high resolution. In recent times, the use of lasers has greatly extended the potential range and resolution of interferometers
Conclusion
This is all about the Interferometry in Metrology. We have different measurement instruments based on this optical technique. as we already mention about the Optical flats above. We have other types of interferometers, such as NPL Flatness Interferometer, Pitter–NPL Gauge Interferometer and Laser Interferometer.

Leave a Reply