Modelling, Assembling and drafting in Creo can be exciting and fun. But sometimes if you want import saved view orientations in to bunch of models it can be not simple as it is supposed to be. Since Creo is one the best CAD software for engineers who work with large assemblies and multiple components.
For people new to Creo, PTC Creo is a family or suite of CAD software, that supports product design for discrete manufacturers and is developed by PTC.
Importing saved view orientations in Creo
I tried to find a feature already available in Creo for this task. and it is not available.
After reading a lot of discussions from different communities and forums, I can confirm that this is not available as a direct feature from Creo. I hope this becomes a feature in future versions of Creo.
For now, I learned a workaround for this task. That is Map keys. Yes, with mapkeys it is possible!
Also, if you have not created the parts already, you can create the required views in the first part in Creo and save it as a template. Thereafter you can use this template for all your future work so that all the parts you created with this template will consist of the view you have created in that template.
I agree this is not a solution for Importing views, But the map keys are a temporary solution. But it is a little tricky. I will help you with how you can do it.
For this, We have to figure out the angles of all the views before hand using the orient wizard. once we have this we can record the keystrokes/mouse clicks and save them as mapkeys and initiate them with a simple keystroke for all the models you want.
Creating Orientations with MapKey Step-by-step
Please strictly follows the action that you have to perform with the keyboard or mouse as exactly specified after you hit the map key record.
Open the map key Wizard
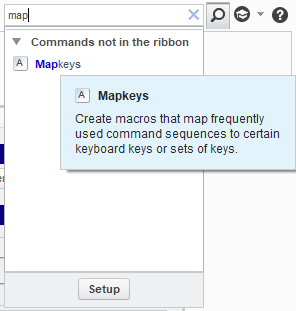
1. Start the Mapkey wizard, start recording a new map key and record these keyboard strokes and the mouse clicks.
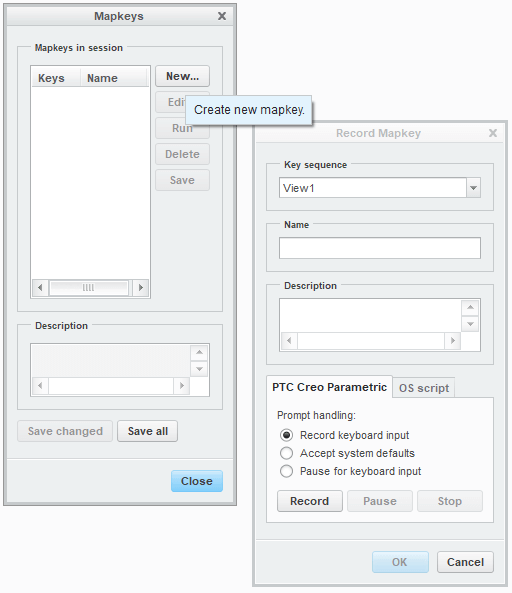
Start Recording
2. Using Mouse, click on the “View” Tab from the ribbon, Click the drop down menau of “Manage Views” ans select the “View Manager”
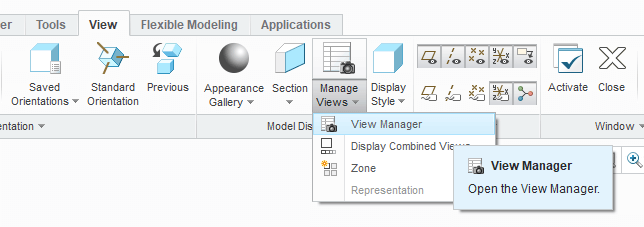
3. Using the mouse switch to “Orient”, click “New” and then suing the Keyboard stroke “Enter”
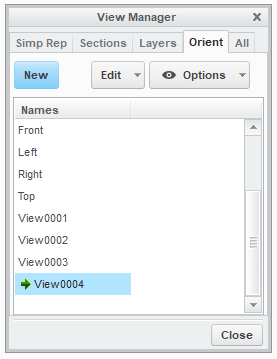
So there will be a new view created. Better not to enter any keyboard strokes for the name of the view. so it automatically creates view 0001 and View 002 as a series. Or you can use the feature from enter “Pause for keyboard enter” so you can enter your own names for the views.
4. Using the mouse, right click on the created view, select “Redefine”
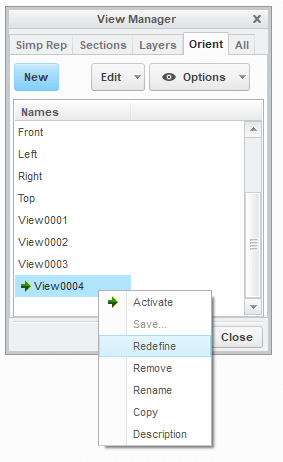
5. Using mouse, from the type dropdown, switch to “Dynamic Orient”
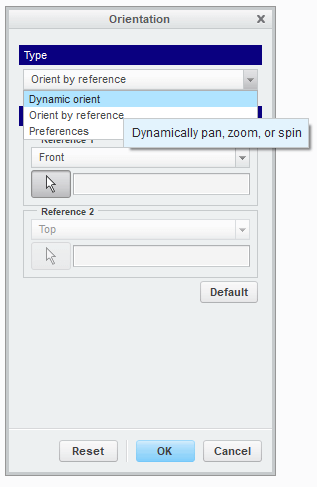
6. Now you can see the follwoing tools. From the spin tools, you can orient the model as exactly you want. Either you can use the mouse help of scrubber, or enter the input the angles.
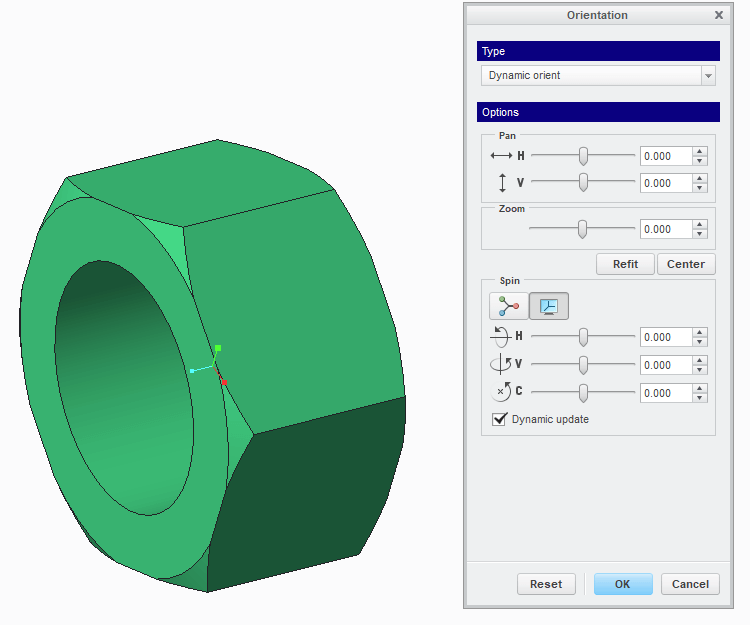
7. Click ok to finish this wizard.
8. Stop the Map Key record.
Thats it you can save this into config.pro file and use this to create in any mode by simply running the map key.
You can create all view you required in single map keys and run it for the models you want.
You can access these created view from the standard quick vie manager
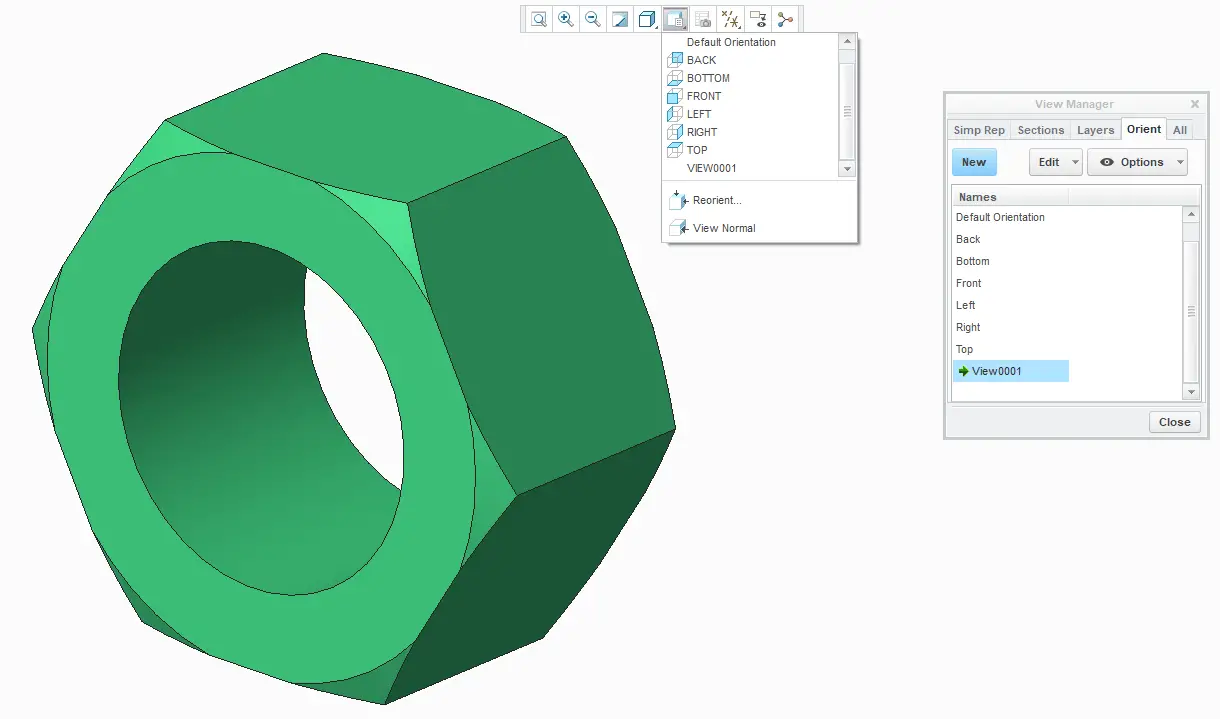
THis is how you can import saved view orientations in Creo. Let us know if you face any issues in recording you map key the comment section below. We will help you.

Leave a Reply