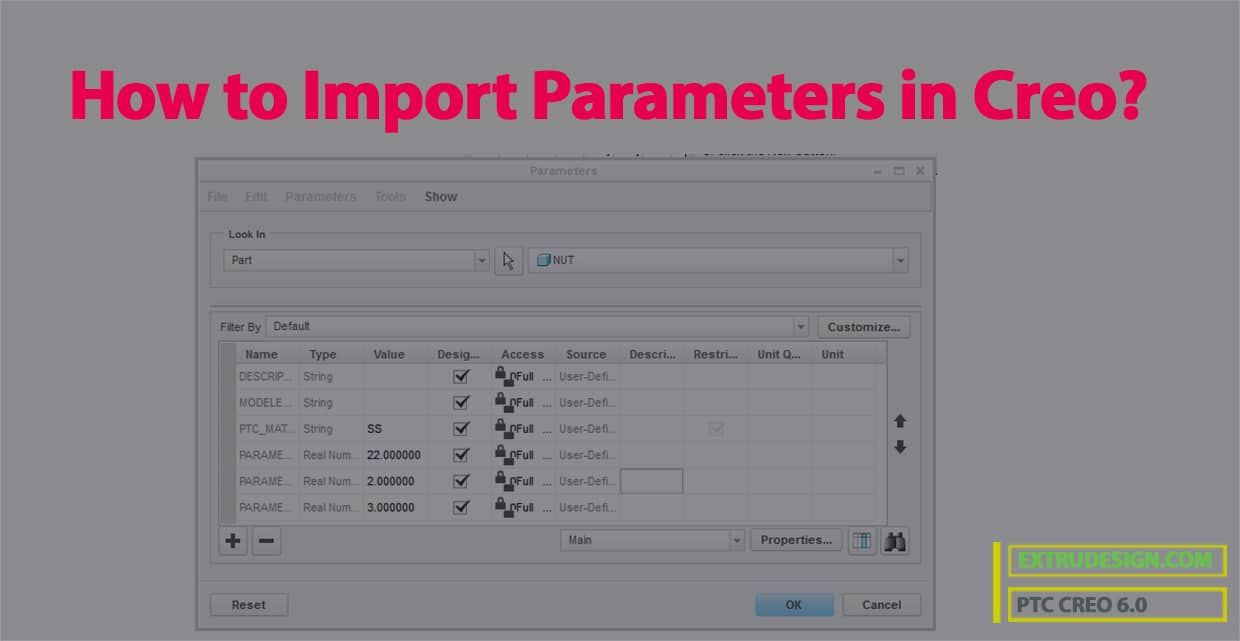
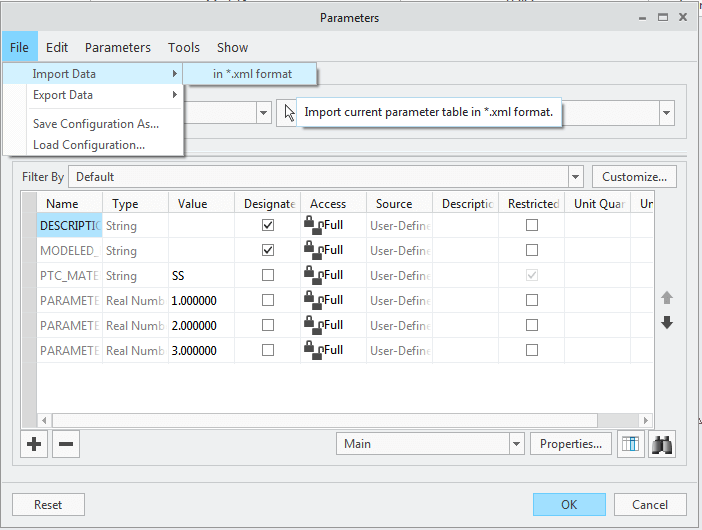
Modelling and Drafting in Creo 6.0 are very interesting and fun. When you are modelling a component and need to add many parameters for that model. You can’t just manually add. You wanted to Import them. When you need to Import Parameters in Creo for parts and assemblies It can be done. Figuring out this can be pretty frustrating for some as it should not be since Creo is one the best CAD software for engineers who work with large assemblies and also a wide variety of families of products with different sizes and types. Importing Parameters in Creos is a myth for some people. Let us not too worry about this and solve this with ease.
For people new to Creo, PTC Creo is a family or suite of CAD software, that supports product design for discrete manufacturers and is developed by PTC.

What are the Parameters in Creo?
In Creo Parametric, Parameters basically allow us to store information and extract material properties, certain load and constraint values, design variables, or measures. This is very useful for a parametric design of a model. Following are the functionalities that will be enabled by the Creo parametric Parameters.
- Define material properties in such a way that Creo Simulate can vary individual characteristics of the material. For instance, Young’s modulus or mass density during a design study
- Vary Creo Parametric dimensional parameters as part of a design study.
- Use Creo Parametric parameters as the limits or goals of an optimization study.
- In order to define the thickness of simple shells or the stiffness properties of simple springs.
These parameters can be used in Relations in creo to do further calculations for parametric modelling. And also useful to populate the information in Drawings.
Let us switch back to our subject of how we can Import Parameters in Creo.
Import Parameters in Creo
The best advice to avoid such a situation is that when you need to create many parameters in the model Better you create a Part template( Start part) with all these parameters inside it and create your parts using this start part (template).

But if you did not do this and have hundreds of parts and assemblies already existing without the parameters that did not use our default start part template. You need these parameters in Windchill or other PLM software that are missing from their files. Our only hope will get to know how to Import Parameters in Creo.
Before we can Import Parameters in Creo, we need to know a few limitations. Those are
- If the parameter has a restricted parameter list associated with it, it will not import.
- If the parameters are designated, when imported they have to be manually designated.
- An imported parameter that already exists in the file will have its assigned value erased after the import.
I have 3 different Solutions
Solution 1: Import Parameters in Creo Using Map Keys
The Map keys function in Creo is a one-stop destination for you to do many repetitive tasks in Creo. If you can record a mapkey using the old parameter UI (hidden config), it can create any missing parameters, set their values, and designate them.
A mapkey built with this old interface will not overwrite any existing parameter values and won’t stop running if some parameters already exist.
Following is the script for an example mapkey. This will help you create a bunch of parameters, set their values, and designate them.
mapkey tucp @MAPKEY_NAMECreate Parameters;@MAPKEY_LABELCreate Parameters;\
mapkey(continued) ~ Command `ProCmdRibbonOptionsDlg` ;\
mapkey(continued) ~ Select `ribbon_options_dialog` `PageSwitcherPageList` 1 `ConfigLayout`;\
mapkey(continued) ~ Activate `ribbon_options_dialog` `ConfigLayout.AddOpt`;\
mapkey(continued) ~ Input `add_opt` `InputOpt` `new_parameter_ui`;\
mapkey(continued) ~ Update `add_opt` `InputOpt` `new_parameter_ui`;\
mapkey(continued) ~ Input `add_opt` `EditPanel` `no`;~ Update `add_opt` `EditPanel` `no`;\
mapkey(continued) ~ Activate `add_opt` `AddOpt`;\
mapkey(continued) ~ Activate `ribbon_options_dialog` `OkPshBtn`;\
mapkey(continued) ~ Activate `UITools Msg Dialog Future` `no`;\
mapkey(continued) ~ Command `ProCmdMmParams`;~ Command `ProCmdDwgParameters` ;#PART;\
mapkey(continued) #CREATE;#STRING;CATEGORY;<EMPTY_STR>;\
mapkey(continued) #CREATE;#STRING;COATING;<EMPTY_STR>;\
mapkey(continued) #CREATE;#STRING;CUSTOMER_NAME;<EMPTY_STR>;\
mapkey(continued) #CREATE;#STRING;CUSTOMER_NUMBER;<EMPTY_STR>;\
mapkey(continued) #CREATE;#STRING;CUSTOMER_REVISION;<EMPTY_STR>;\
mapkey(continued) #CREATE;#STRING;DATE_CREATED;<EMPTY_STR>;\
mapkey(continued) #CREATE;#STRING;DESCRIPTION;<EMPTY_STR>;\
mapkey(continued) #CREATE;#STRING;DESIGNER_NAME;<EMPTY_STR>;\
mapkey(continued) #CREATE;#STRING;MACHINE_LETTER;<EMPTY_STR>;\
mapkey(continued) #CREATE;#STRING;MATERIAL_NAME;<EMPTY_STR>;\
mapkey(continued) #CREATE;#STRING;MATERIAL_SIZE;<EMPTY_STR>;\
mapkey(continued) #CREATE;#STRING;MFG_NAME;<EMPTY_STR>;\
mapkey(continued) #CREATE;#STRING;MFG_NUMBER;<EMPTY_STR>;\
mapkey(continued) #CREATE;#STRING;STATION;<EMPTY_STR>;\
mapkey(continued) #CREATE;#STRING;SUB_CATEGORY;<EMPTY_STR>;\
mapkey(continued) #DESIGNATE;#PARAMETERS;#CATEGORY;#COATING;#CUSTOMER_NAME;#CUSTOMER_NUMBER;\
mapkey(continued) #CUSTOMER_REVISION;#DATE_CREATED;#DESCRIPTION;#DESIGNER_NAME;\
mapkey(continued) #DOC_CNTL_STATUS;#EXPORT_DATA;#MACHINE_LETTER;#MATERIAL_NAME;\
mapkey(continued) #MATERIAL_SIZE;#MFG_NAME;#MFG_NUMBER;#STATION;#SUB_CATEGORY;#DONE SEL;\
mapkey(continued) ~ Command `ProCmdMmParams`;~ Command `ProCmdDwgParameters` ;#ASSEMBLY;\
mapkey(continued) #CREATE;#STRING;CATEGORY;<EMPTY_STR>;\
mapkey(continued) #CREATE;#STRING;COATING;<EMPTY_STR>;\
mapkey(continued) #CREATE;#STRING;CUSTOMER_NAME;<EMPTY_STR>;\
mapkey(continued) #CREATE;#STRING;CUSTOMER_NUMBER;<EMPTY_STR>;\
mapkey(continued) #CREATE;#STRING;CUSTOMER_REVISION;<EMPTY_STR>;\
mapkey(continued) #CREATE;#STRING;DATE_CREATED;<EMPTY_STR>;\
mapkey(continued) #CREATE;#STRING;DESCRIPTION;<EMPTY_STR>;\
mapkey(continued) #CREATE;#STRING;DESIGNER_NAME;<EMPTY_STR>;\
mapkey(continued) #CREATE;#STRING;MACHINE_LETTER;<EMPTY_STR>;\
mapkey(continued) #CREATE;#STRING;MATERIAL_NAME;<EMPTY_STR>;\
mapkey(continued) #CREATE;#STRING;MATERIAL_SIZE;<EMPTY_STR>;\
mapkey(continued) #CREATE;#STRING;MFG_NAME;<EMPTY_STR>;\
mapkey(continued) #CREATE;#STRING;MFG_NUMBER;<EMPTY_STR>;\
mapkey(continued) #CREATE;#STRING;STATION;<EMPTY_STR>;\
mapkey(continued) #CREATE;#STRING;SUB_CATEGORY;<EMPTY_STR>;\
mapkey(continued) #DESIGNATE;#PARAMETERS;#CATEGORY;#COATING;#CUSTOMER_NAME;#CUSTOMER_NUMBER;\
mapkey(continued) #CUSTOMER_REVISION;#DATE_CREATED;#DESCRIPTION;#DESIGNER_NAME;\
mapkey(continued) #DOC_CNTL_STATUS;#EXPORT_DATA;#MACHINE_LETTER;#MATERIAL_NAME;\
mapkey(continued) #MATERIAL_SIZE;#MFG_NAME;#MFG_NUMBER;#STATION;#SUB_CATEGORY;#DONE SEL;\
mapkey(continued) ~ Command `ProCmdMmParams`;~ Command `ProCmdDwgParameters` ;#DRAWING;\
mapkey(continued) #CREATE;#STRING;CATEGORY;<EMPTY_STR>;\
mapkey(continued) #CREATE;#STRING;COATING;<EMPTY_STR>;\
mapkey(continued) #CREATE;#STRING;CUSTOMER_NAME;<EMPTY_STR>;\
mapkey(continued) #CREATE;#STRING;CUSTOMER_NUMBER;<EMPTY_STR>;\
mapkey(continued) #CREATE;#STRING;CUSTOMER_REVISION;<EMPTY_STR>;\
mapkey(continued) #CREATE;#STRING;DATE_CREATED;<EMPTY_STR>;\
mapkey(continued) #CREATE;#STRING;DESCRIPTION;<EMPTY_STR>;\
mapkey(continued) #CREATE;#STRING;DESIGNER_NAME;<EMPTY_STR>;\
mapkey(continued) #CREATE;#STRING;MACHINE_LETTER;<EMPTY_STR>;\
mapkey(continued) #CREATE;#STRING;MATERIAL_NAME;<EMPTY_STR>;\
mapkey(continued) #CREATE;#STRING;MATERIAL_SIZE;<EMPTY_STR>;\
mapkey(continued) #CREATE;#STRING;MFG_NAME;<EMPTY_STR>;\
mapkey(continued) #CREATE;#STRING;MFG_NUMBER;<EMPTY_STR>;\
mapkey(continued) #CREATE;#STRING;STATION;<EMPTY_STR>;\
mapkey(continued) #CREATE;#STRING;SUB_CATEGORY;<EMPTY_STR>;\
mapkey(continued) #DESIGNATE;#PARAMETERS;#CATEGORY;#COATING;#CUSTOMER_NAME;#CUSTOMER_NUMBER;\
mapkey(continued) #CUSTOMER_REVISION;#DATE_CREATED;#DESCRIPTION;#DESIGNER_NAME;\
mapkey(continued) #DOC_CNTL_STATUS;#EXPORT_DATA;#MACHINE_LETTER;#MATERIAL_NAME;\
mapkey(continued) #MATERIAL_SIZE;#MFG_NAME;#MFG_NUMBER;#STATION;#SUB_CATEGORY;#DONE SEL;\
mapkey(continued) #DONE/RETURN;#DONE/RETURN; ~ Command `ProCmdRibbonOptionsDlg` ;\
mapkey(continued) ~ Select `ribbon_options_dialog` `PageSwitcherPageList` 1 `ConfigLayout`;\
mapkey(continued) ~ Activate `ribbon_options_dialog` `ConfigLayout.AddOpt`;\
mapkey(continued) ~ Input `add_opt` `InputOpt` `new_parameter_ui`;\
mapkey(continued) ~ Update `add_opt` `InputOpt` `new_parameter_ui`;\
mapkey(continued) ~ Input `add_opt` `EditPanel` `yes`;~ Update `add_opt` `EditPanel` `yes`;\
mapkey(continued) ~ Activate `add_opt` `AddOpt`;\
mapkey(continued) ~ Activate `ribbon_options_dialog` `OkPshBtn`;\
mapkey(continued) ~ Activate `UITools Msg Dialog Future` `no`;
Source: TomU, PTC Creo Community.
Run it on a test part to see if it works and how it is creating parameters to understand how you can sequence the steps for your own map key. Let us know if this helps.
Solution 2: Import Parameters in Creo using Nitro – BOM
Nitro – BOM is a sort of powerful Plug-in which can get these things done with very few clicks. Check it out.
Solution 3: Import Parameters in Creo using CREOSON
Along with this Plug-in, there is this powerful open-source automation Addon called CREOSON which has more than 150+ automation functions built right in for Creo Parametric and Windchill together.
I hope it helps you import the parameters you have for the parts you have already created. Let us know if this solves your issue in the comment section below.

Hello sir,
I am so fraking greatful of the example mapkey about feeding params to a blank files.
Super good job, my CREO adjustments are becoming way easier now.
Good luck and Thx again.
Glad it helped you. You are welcome.