In the previous tutorial, we have discussed the list of Material Testing Methods, and how to conduct the Tensile test, in this tutorial we are going to discuss how to conduct the Compression test.

Compression Test
The Compression test is also similar to the tensile test, the way we conduct it on the UTM. It also comes under the destructive test where we apply the gradually increased load up to the material get a fracture. So a Compression test also a static test as sub-classification.
This Compression test is used to find the behaviour of the material when it is subjected to a slowly applied Compression load up to when the material gets a fracture.
This test is also will be conducted on the universal testing machine. Also, know as UTM.
Universal Testing Machine
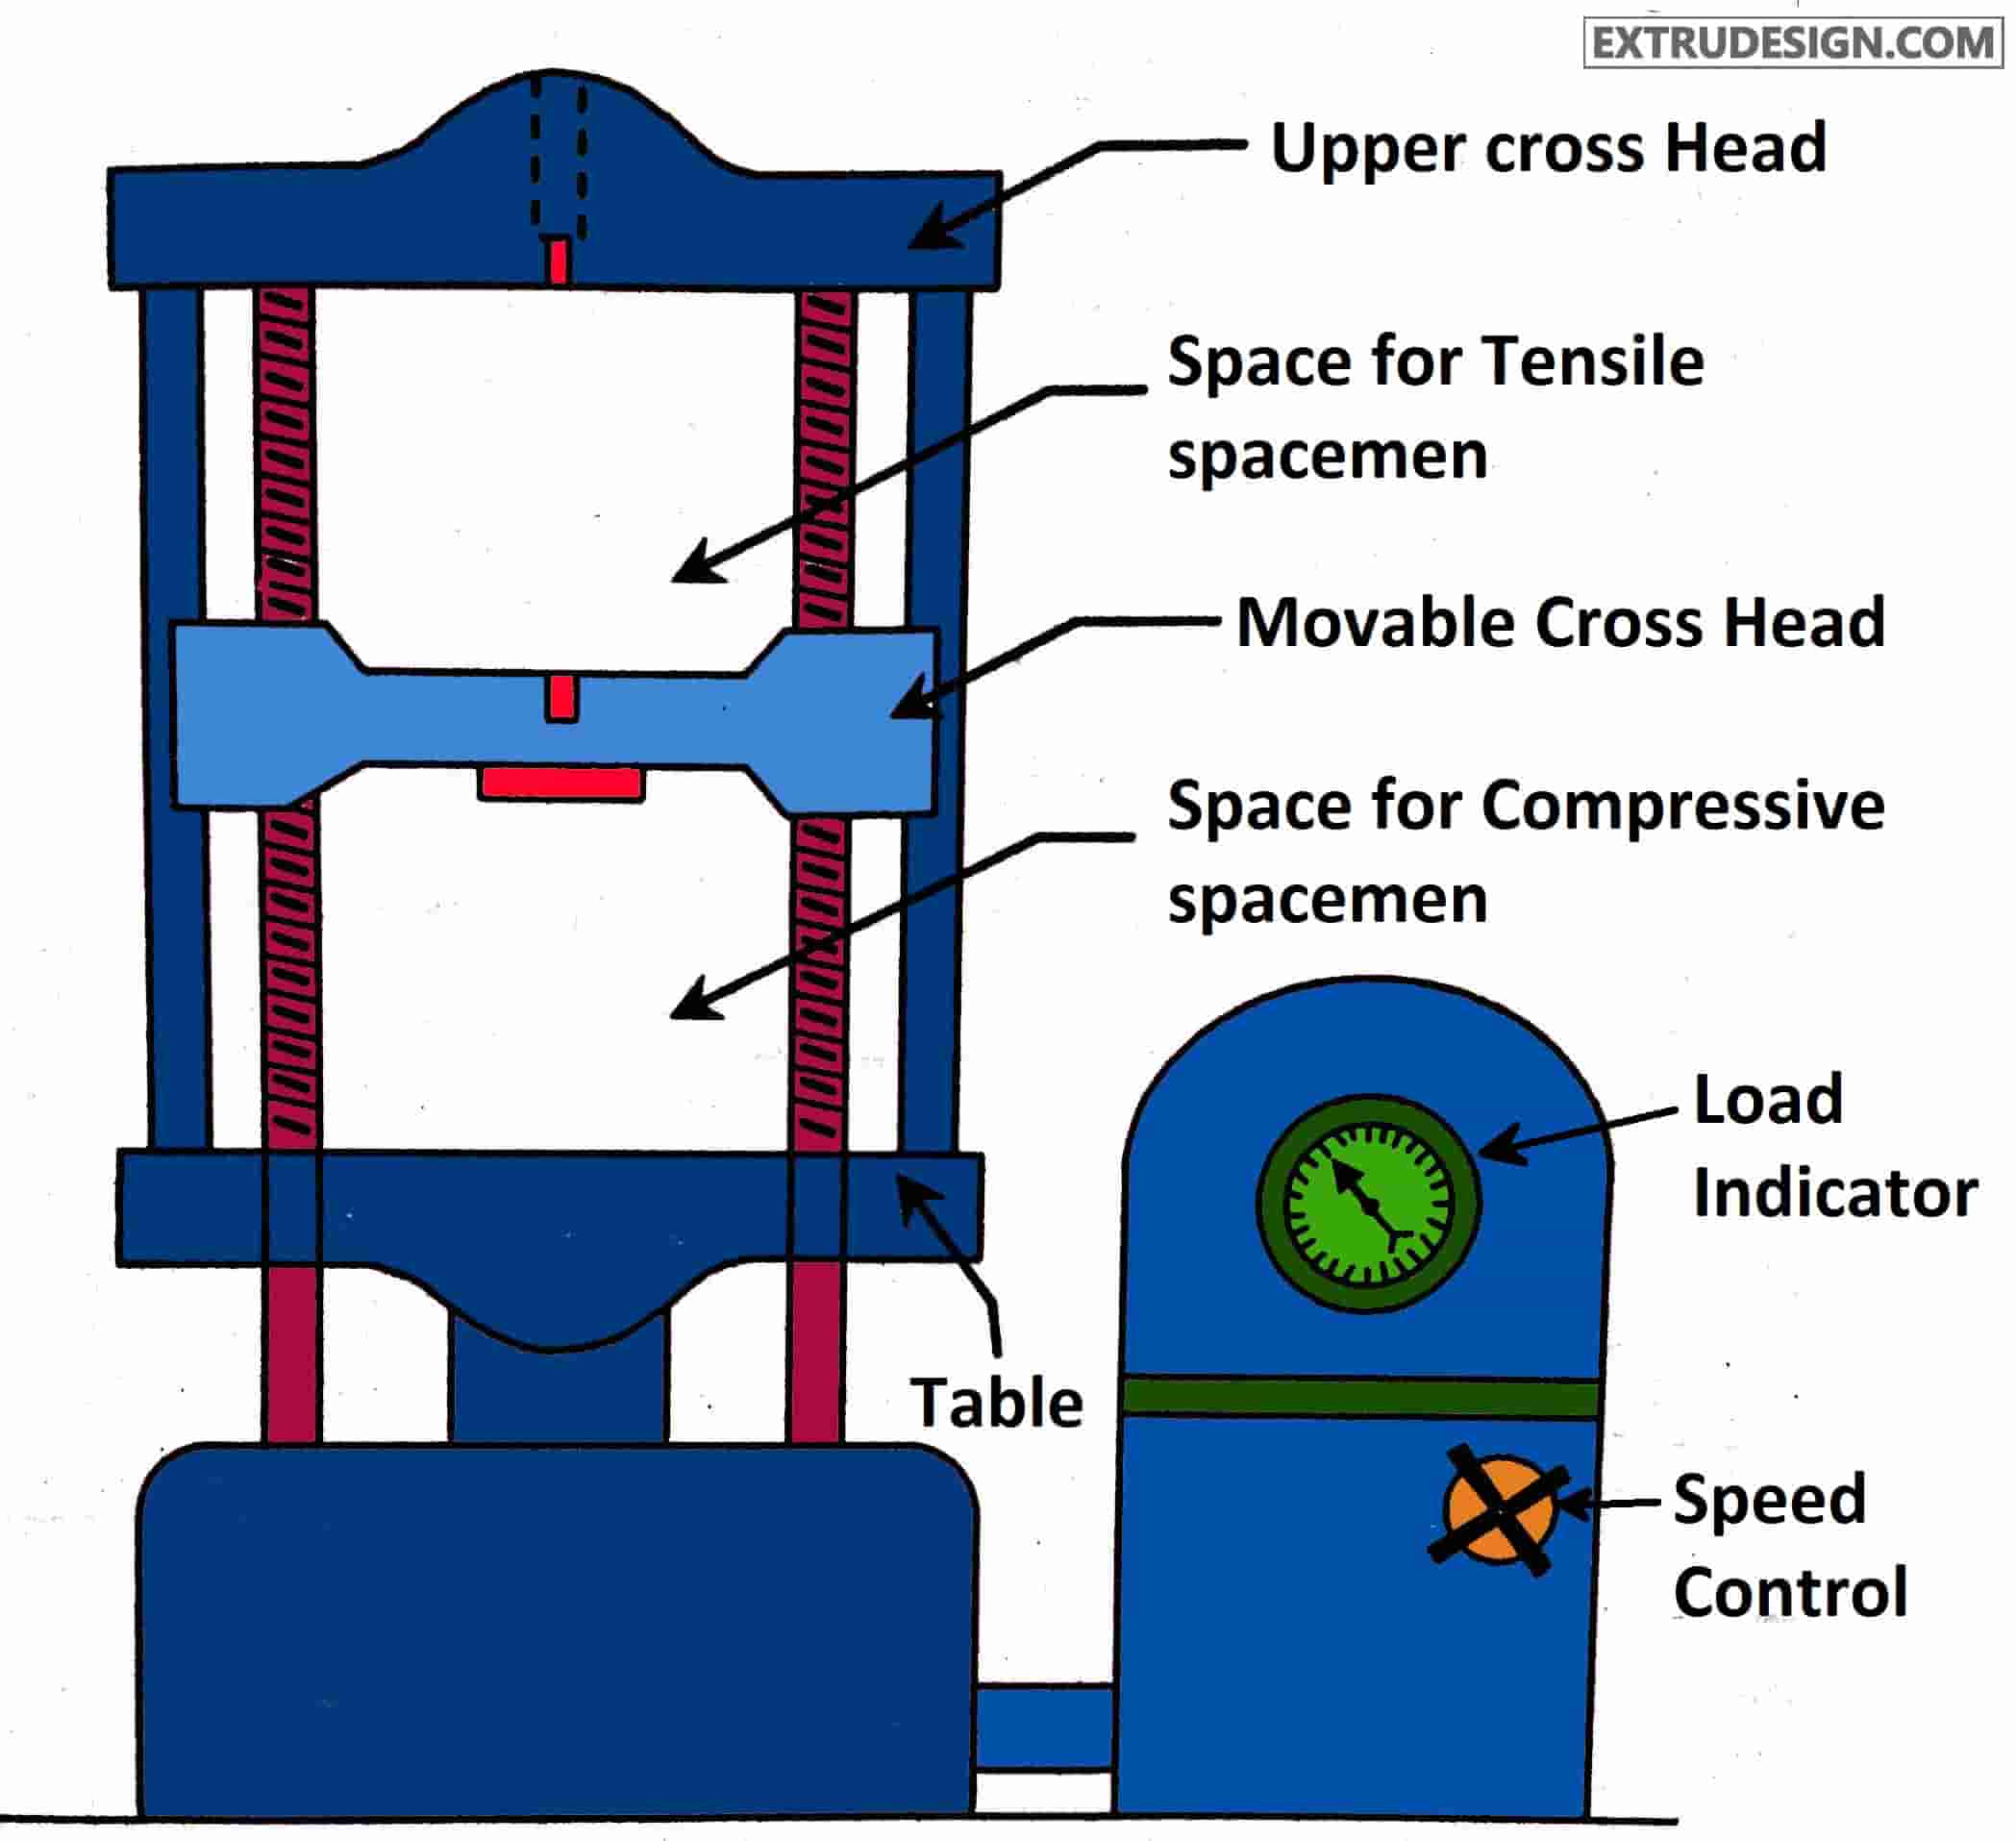
The main parts of the Universal testing machine are
- Upper cross Head
- Movable cross Head
- Table
- Load Indicator
- Speed control
- Space for tensile specimen
- Space for Compressive Specimen
Construction of Universal Testing Machine
The universal testing machine has two vertical threaded shafts where the movable crosshead will slide on these vertical Bars. the Cross head will be constant. If it is a tensile test then the specimen will be placed in between the Cross head and the movable head jaws, if it is a Compression test The specimen will be placed in between the movable head and the table. With the help of the loading dial indicator, we can observe how much load is applied to the specimen during the test.
We can do both the Tensile test and the Compression test on this universal testing machine.
Back to the subject Compression testing, We have to place the specimen in between the table and the movable crosshead for Compression testing.
Now we have to apply the load gradually so that the movable crosshead will move downwards and presses the specimen on the table.
We have to slowly increase the load until the specimen get a fracture or break completely.
You can see that the specimen will be able to comprised and can come back to its original shape when the load is removed.

After the applied load crosses elastic limit the specimen cannot regain its original shape even after removal of the load but still, it will comprise (Bulges or swelling out).
After the load reaching the ultimate comprising point, the specimen starts bulges more and gets fracture due to the local extension.
Due to the bulging and swelling out more, the load will be reduced for the final fracture.
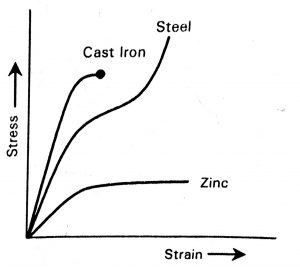
Stress-strain diagram for the different materials
Stress-strain diagram for the different materials is shown below.
Conclusion
This is how we will conduct the Compression test and observation of the fracture for the different materials. If you have any thought please let us know in the comments sections.
Leave a Reply