Metrology is a science of measurements. We have discussed what are the different Linear measuring instruments. Vernier scale is a precise measuring instrument, Comparatively low accuracy than the other precision measuring instruments. The different types of Vernier callipers are available to measure internal, external measurements. In this article, we are going to discuss the Vernier Calliper Diagram, Working principle.
Vernier Calliper Construction:
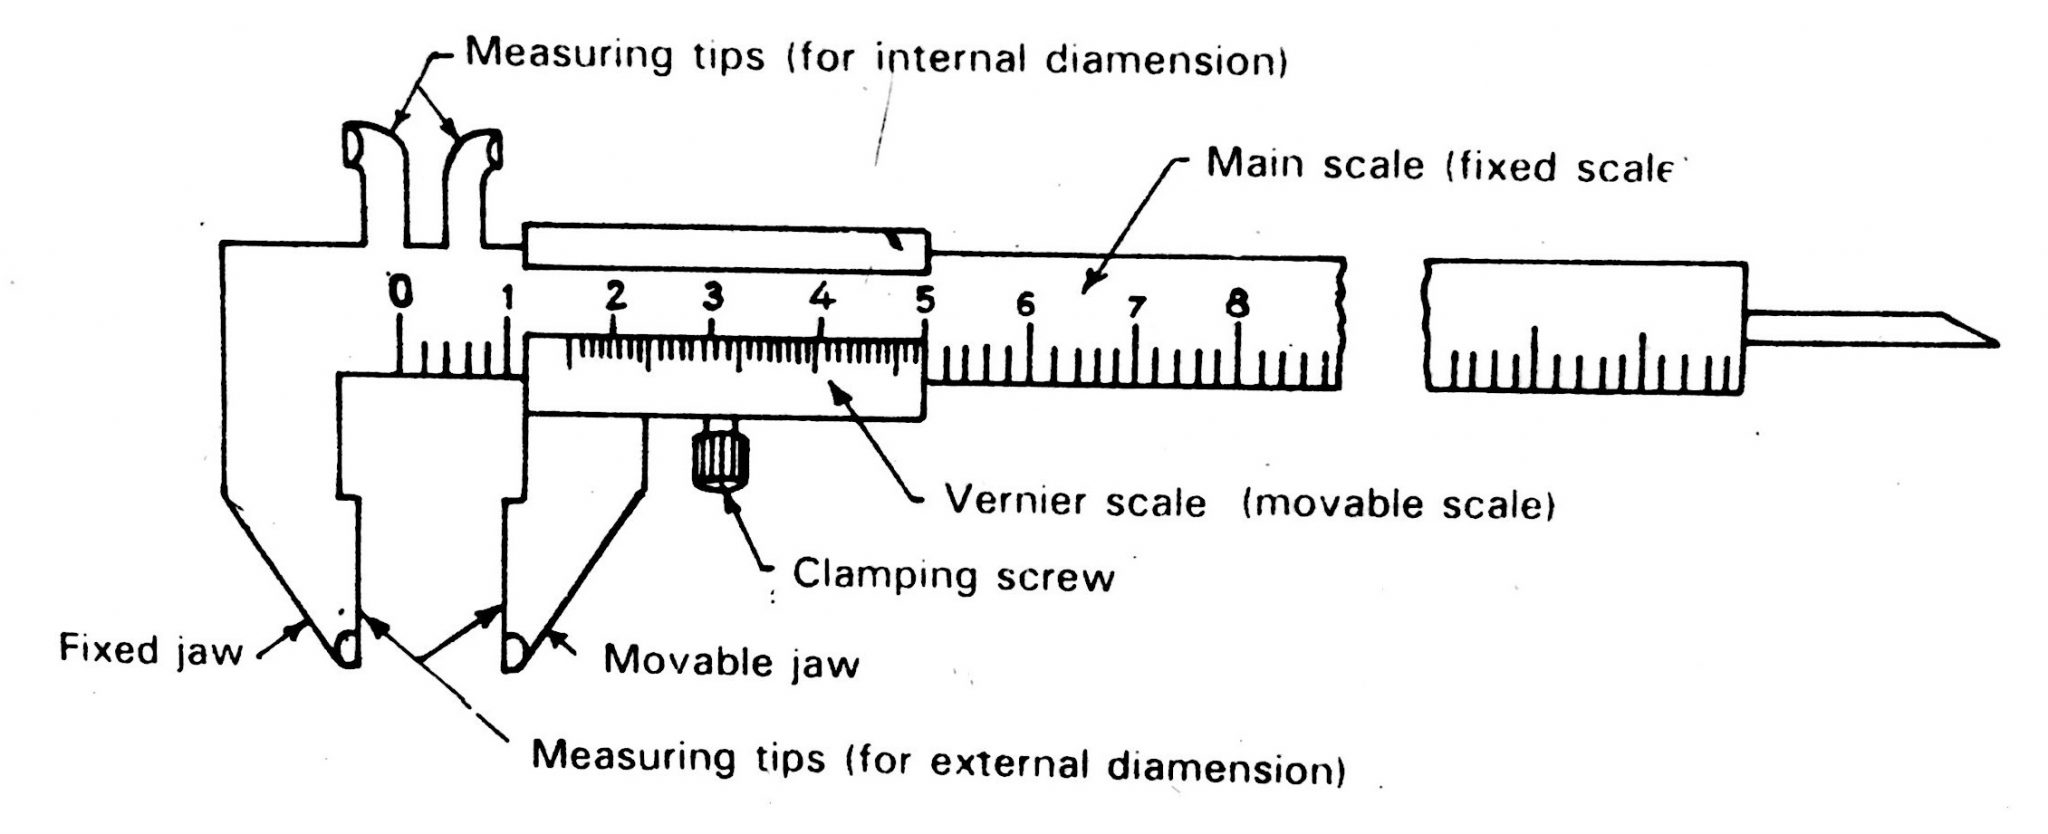
Vernier calliper consists of two scales. One is fixed and the other is movable. The fixed scale is called the main scale. It is a calibrated L-shape frame and carries a fixed jaw. the movable scale, called Vernier scale. Which is slides over the main scale and carries movable jaw. these movable and fixed jaws having to measure tips for internal and external measurements.
Vernier Calliper Diagram

Vernier Calliper working principle:
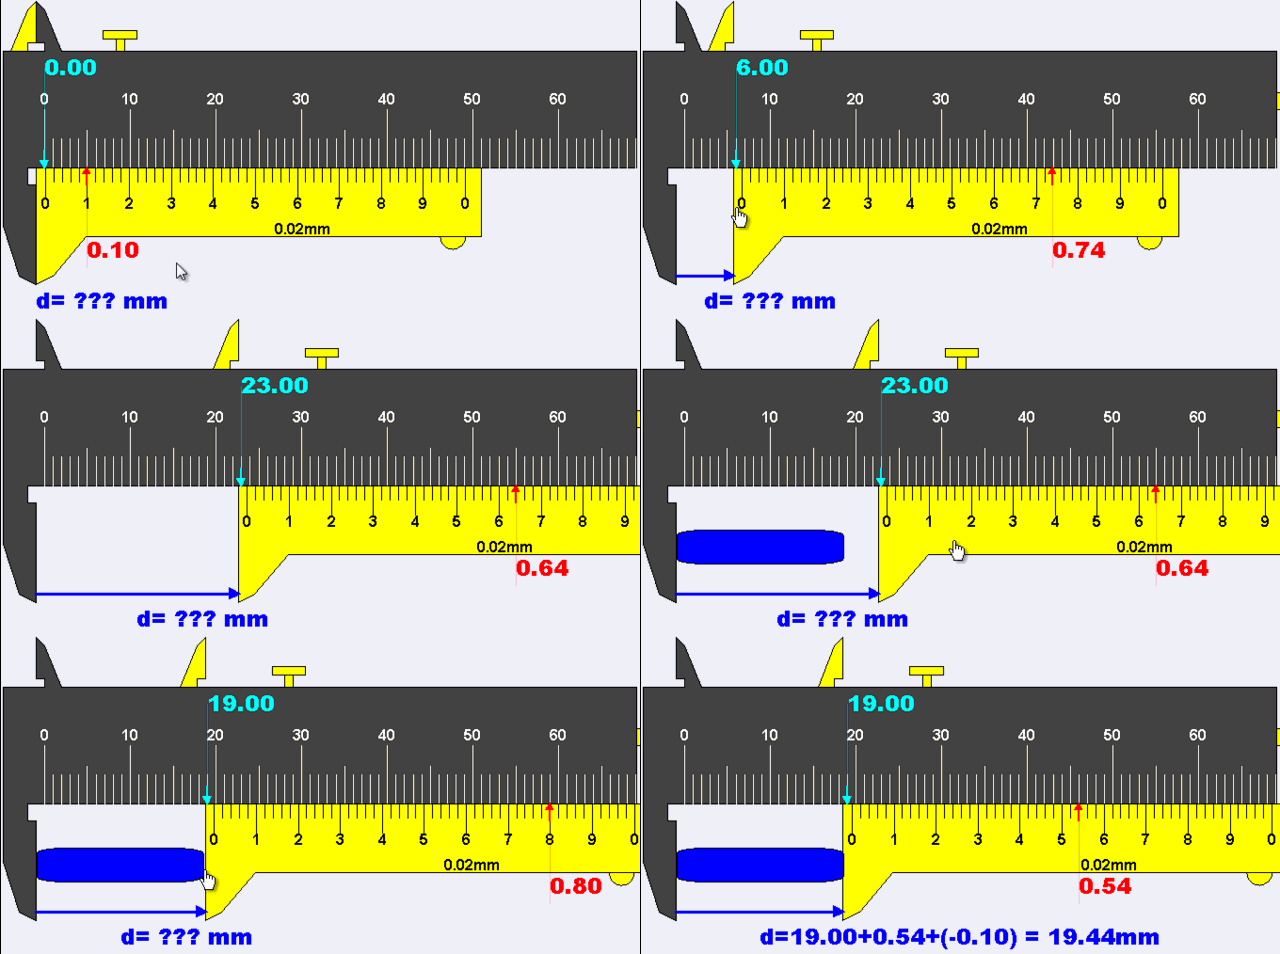
Vernier scale is a visual aid, That allows the user to read measurements more precisely than any other instrument. Vernier scale indicates where the measurement lies in between two of the graduations on the main scale. See the following GIF to understanding how the vernier scale is moving over the main scale.

Yello clour scale represent vernier scale
Vernier scale is for both internal and external measurements, Used by closing the jaws on to the work surface and taking the readings from the main scale as well as vernier scale. see the above GIF to understand how exactly it works. For the precise setting of the movable jaw, an adjustment screw is provided to lock the sliding scale on the fixed scale.
Vernier Calliper Measurement
Before measuring the instrument it should be checked for zero error. The zero line on the vernier scale should coincide with zero on the main scale.
Start taking a measurement. Insert the object in between the jaws. as shown in the above GIF.
Take the reading in mm on the main scale to the left of zero on sliding scale

Now count the number of divisions on the vernier scale from the zero to a line which exactly coincides with any line on the main scale. from the figure.
The total reading =the main scale reading + the number of the division at which it exactly coincides with any division on the main scale X least count of vernier calliper.
For the above-mentioned diagram
Main scale reading= 12.5
number of devisions= 17
least count for the vernier calliper=0.02
Total reading= 12.5 + 17 x 0.02 = 12.84mm
Continue Reading Different types of vernier calipers

Please how did you get the 0.02 ?
Least count for Vernier caliper = Least count of main scale/Number of divisions on the vernier scale.
Least count Of the main scale = Scale reading/Number of Divisions On the Main Scale = 10mm/10 = 1mm
Example:
number of divisions on the Vernier Scale = 50 divisions
Least count for Vernier caliper = 1mm/20 = 0.02mm
usually, the Vernier scale is available with the least count of 0.02mm
For more go here:https:Least count of an instrument
* 1mm/50= 0.02 mm
👍
Dear Sir,
I wanted to know the construction and working of Dial Vernier Caliper.
Regards,
Vivek
Beta good night😴😴