Topic: Micrometer, Working Principle, construction, Reading measurements.
The Micrometer is known for screw gauge because a calibrated screw is used for precise measurements. The accuracy of the micrometre screw gauge is 0.01. This is very high accuracy compared to the vernier calliper accuracy 0.02. Most of the engineering works have to require more precession. so screw gauge is the suitable instrument that achieves the required accuracy.
The available micrometre accuracy is up to 0.001

Classification Of Micrometer Screw Gauge
- Outside Micrometer
- Inside Micrometer
- Screw thread Micrometer
- Depth gauge Micrometer
Screw Gauge Working Principle
The working principle of the Micrometer is based on screw and nut.(Rotational moment to linear moment) As we know as the screw rotates one revolution on the screw, then the screw moves linearly by one pitch distance.
Divide the circumference of the screw into a number of fine parts. let’s say 100 parts on the circumference. and the pitch of the screw is 1mm then
The minimum length can be measured the screw gauge = Screw pitch/ Number of parts the circumference
= 1mm/100 = 0.01
We can minimise the pitch distance of the screw to minimise the length that can be measured with that screw gauge.
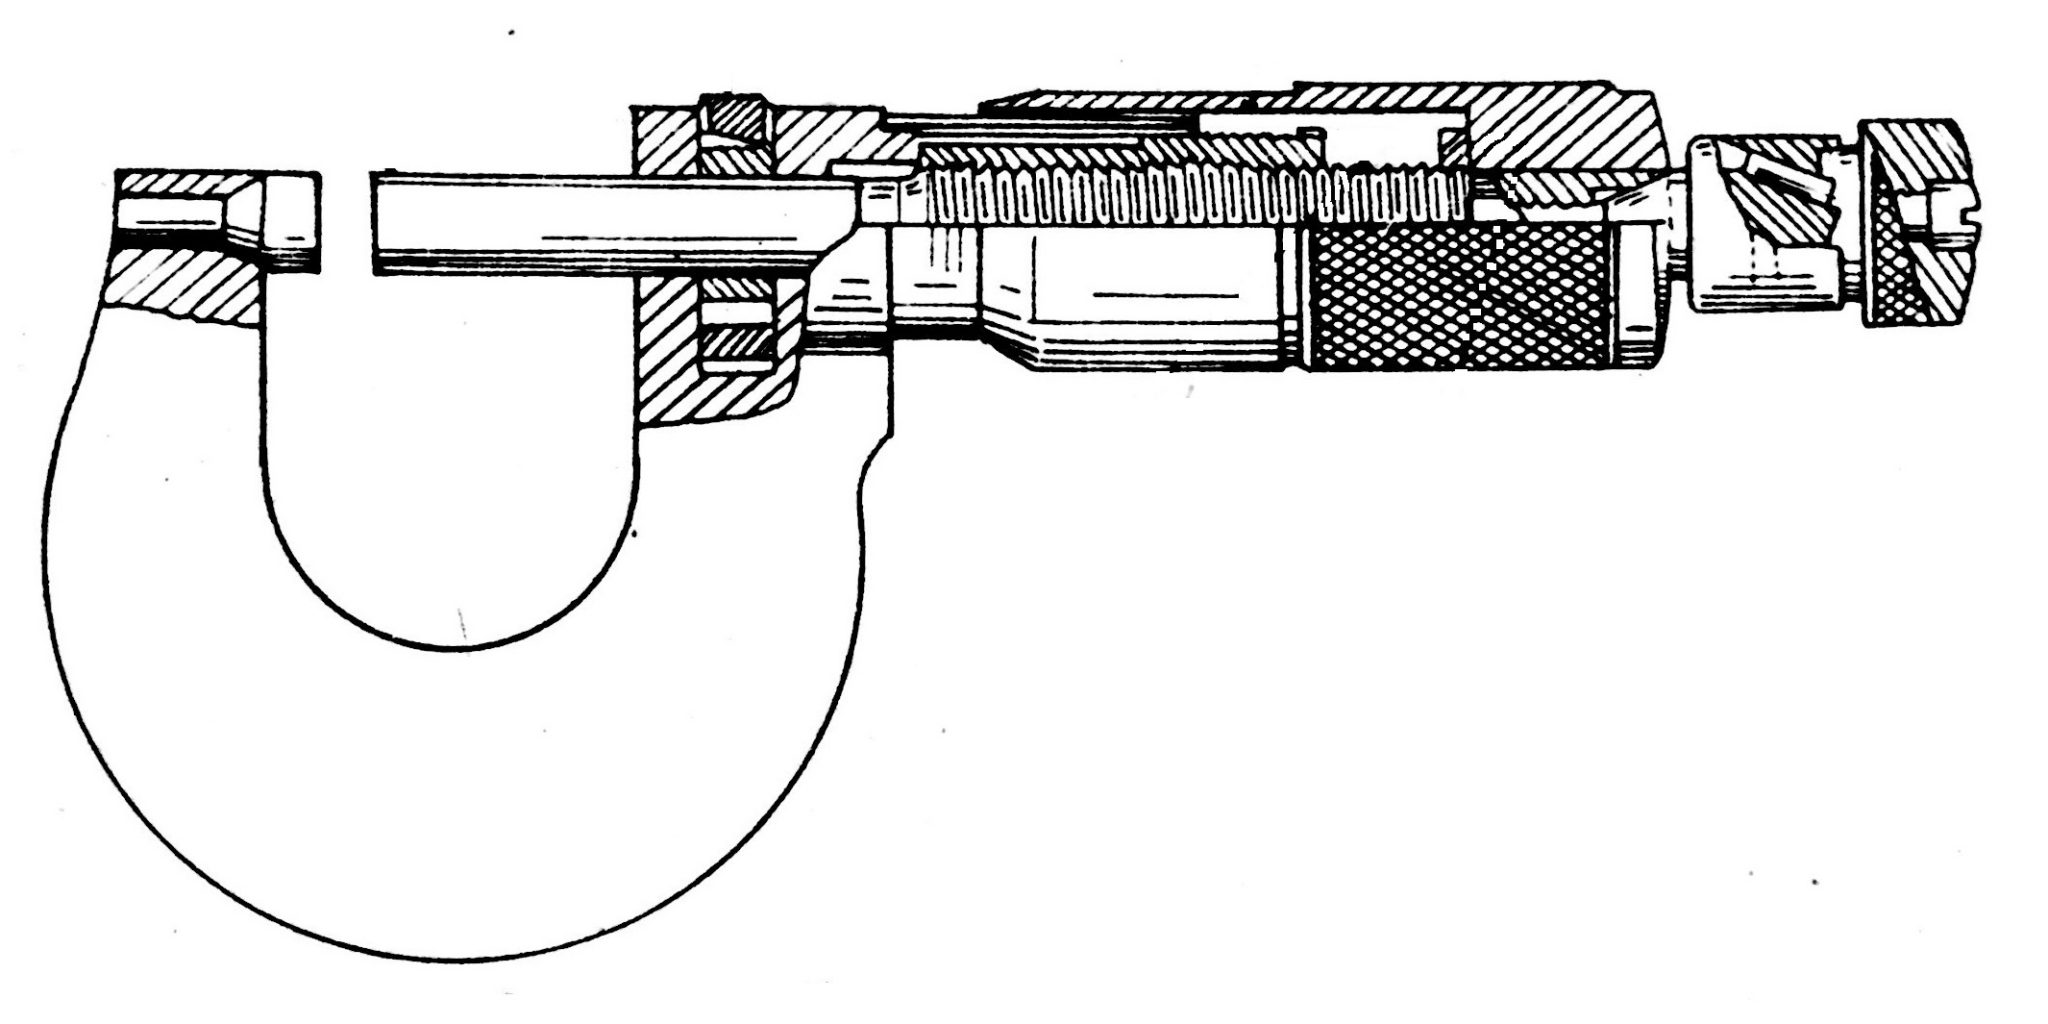
Construction of Micrometer Screw Gauge

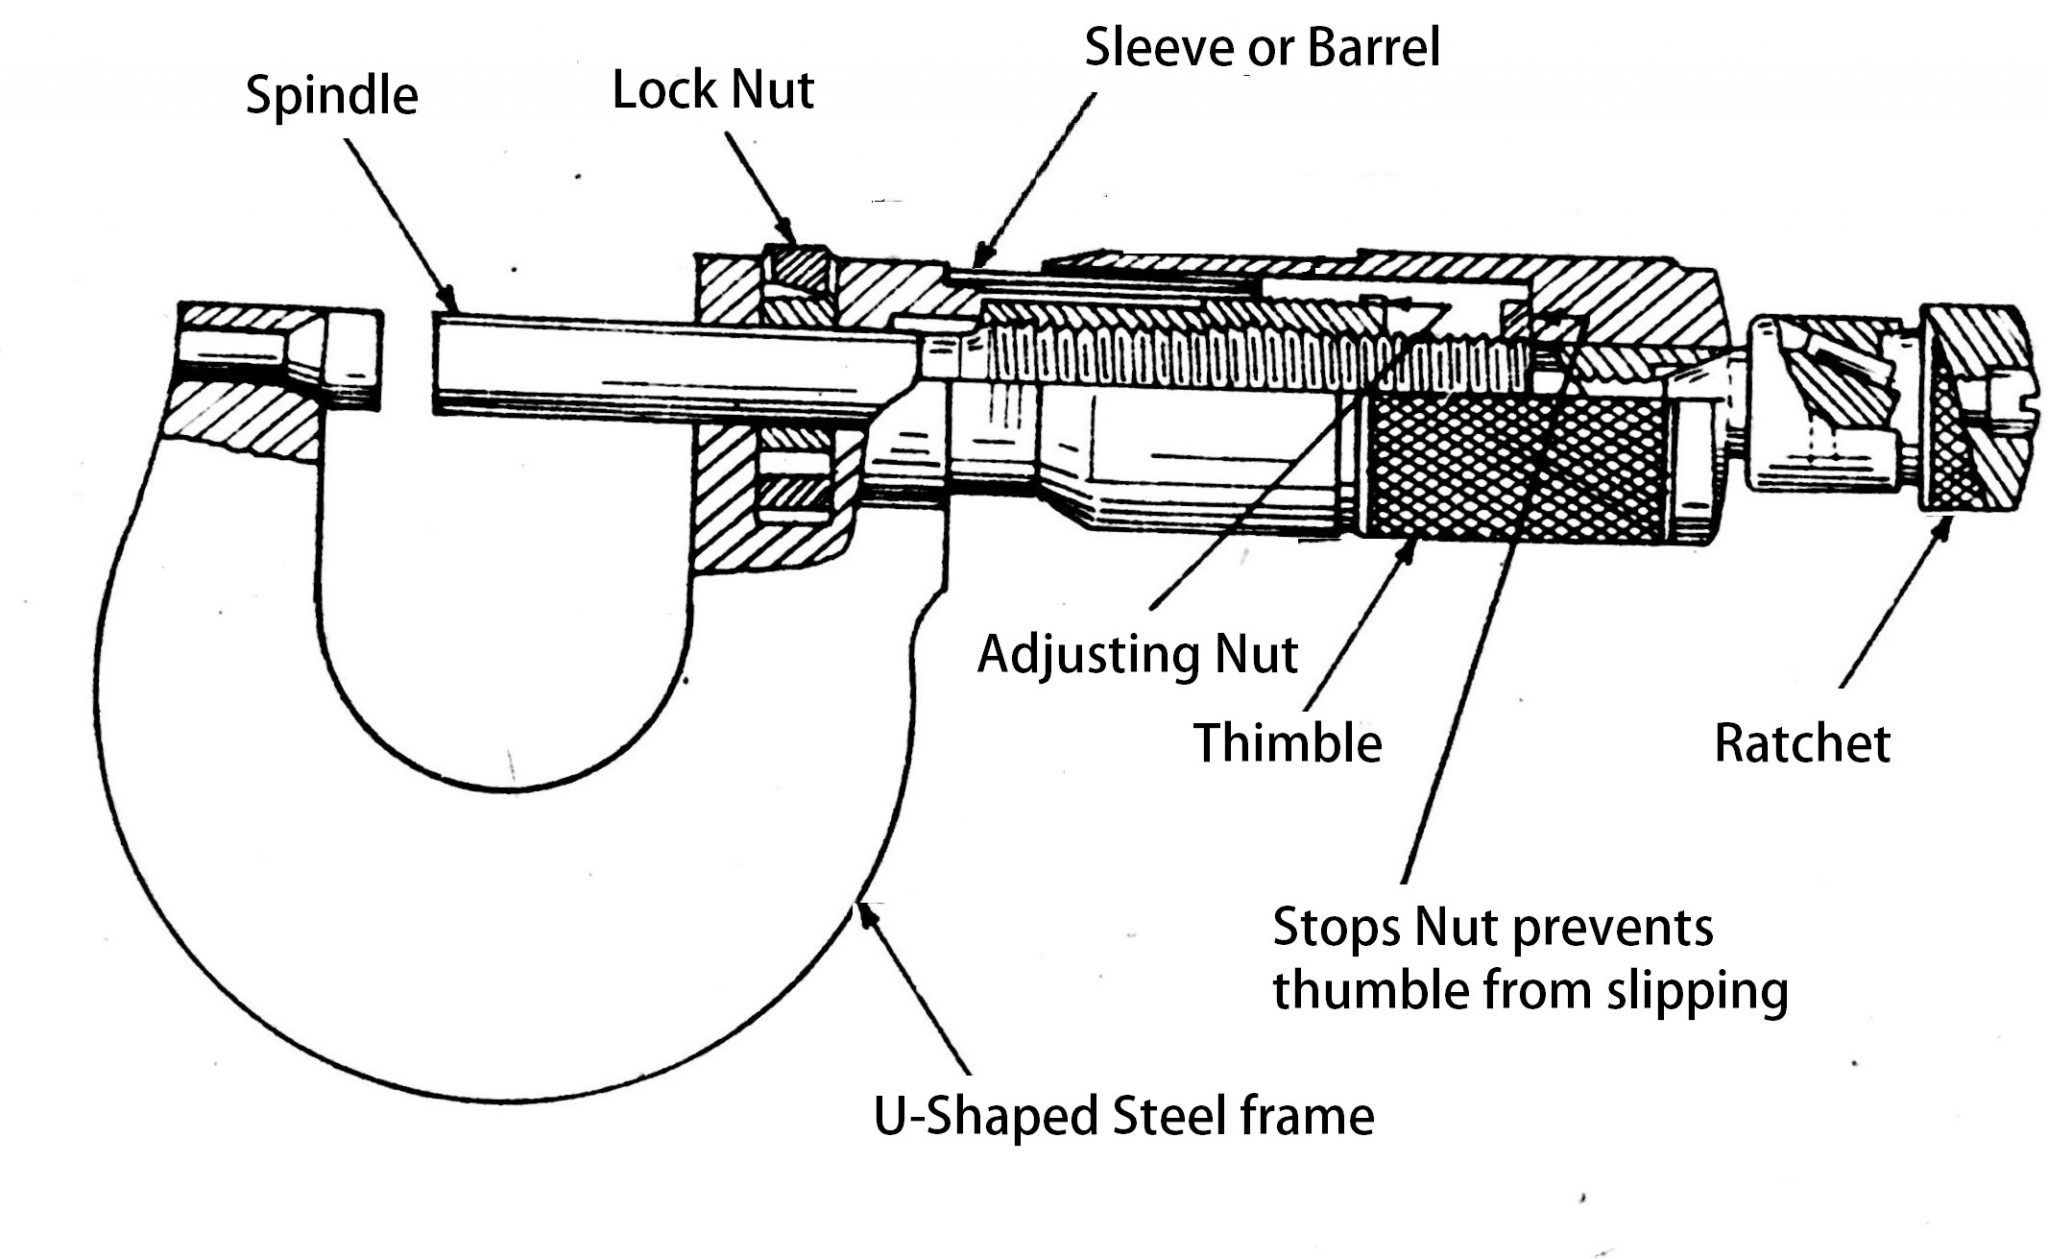
Main parts of Screw gauge
- U-shaped steel frame
- Anvil and spindle
- Lock Nut
- Sleeve or Barrel
- Thimble
- Ratchet
U-shaped Steel Frame
U shaped or C shaped frame will hold all the other parts together. The gap between the two frames in the U or C shaped frame determines the maximum diameter of the workpiece that can be measured with that screw gauge.
Anvil and spindle
Anvils are at the measuring faces. They were attached to the spindle face and fixed face on the frame. The spindle will have the threads acts as a screw and it should be run freely and smoothly through the length of its travel and there should be no backlash between the screw and nut.
Lock Nut
The lock nut is to lock the spindle without altering the distance between the measuring faces when the Micrometer is at its correct reading.
Sleeve or Barrel
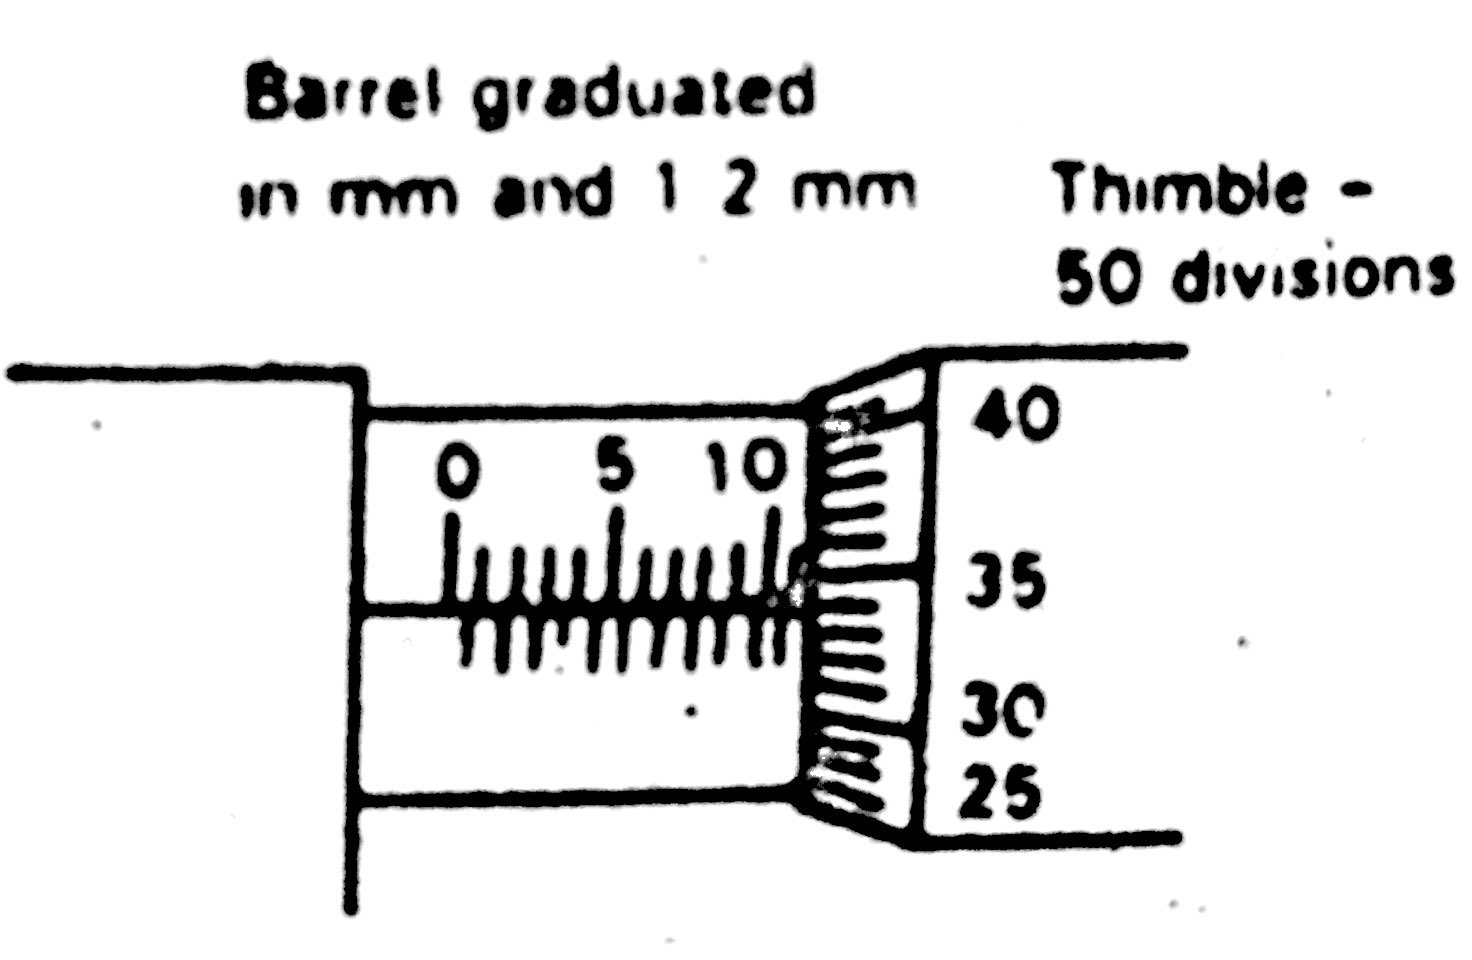
This is having a 0.5 mm division length along the length of the sleeve. This is the main scale for the Micrometer screw gauge.
Thimble
This is the main part of the screw gauge. Which is having 50 divisions on its circumference. It will be moved over the barrel.
Ratchet
The ratchet will be provided at the end of the thimble to assure the accurate measurement by preventing the too much pressure being applied on the micrometer. This slips the thimble over the barrel when the spindle reaches the surface of the workpiece.
Reading measurements with Micrometer Screw Gauge
Setting Zero
Before going to take any measurement with micrometre screw gauge it is necessary to set zero to avoid errors
- Clean the faces of the anvil
- Rotate the thimble until the two measuring faces mate each other and the ratchet starts slipping.
- Take the reading as zero
- If the zero mark on the sleeve thimble is not coinciding with the zero division on the sleeve, then it should be considered that the Micrometer has an error.
- correct this error by Adjusting spanner by slightly rotating the barrel. a hole provided in the barrel to adjust the screw gauge
Reading The Micrometer
- Select the suitable micrometre size depending on the size of the workpiece. ( Usually, the measuring ranges are from 0 to 25 mm, 25 to 50mm, 125 to 150 mm, up to 575 to 600 mm are available.)
- Check the zero error
- Place the Object in between the two measuring faces and rotate the thimble to make the spindle touches the workpiece. Rotate until when ratchet starts slipping over the thimble.
- Now take the reading on the main scale(scale on the sleeve) let’s say it is 11.00mm
- Take the thimble reading which by where the thimble coincides with the reference line on the sleeve or main scale. for example, it coincides with the main scale at the 34th division.
The Micrometer reading = main scale reading+ L.C x Reading of thimble = 11.00+(0.01 x 34) = 11.34mm
Pic Credits: Metrology By M. mahajan


This side is wonderful
Thank you verymuch.
God bless you.
This is quite well explanatory.
Thank you